|
VOL II |
JANUARY ISSUE 004 |
|
|
What's New In This Issue |
January Holiday Greeting
Note: From your Editor in Chef of the AW Virtual Life News letter. 2020.
May I sincerely wish you & your families & the Citizens of ActiveWorlds far & wide. Happy New Year 2020.
Every Year leaves a trace and something is taken away. I wish the bright days ahead of all of the citizens of ActiveWorlds in 2020.
May the New Year bring you Joy & Happiness & Good Health for you & your family.
Leaving things of Old behind may new adventures fill your days ahead. We face new challenges with every New Year.
We face these with courage and strength and the wisdom to achieve our goals so I ask you have you made your New Years resolutions for 2020 yet?
A New Year is like empty book, the Pen is in your hands. It is your chance to write a beautiful story for yourself, build in ActiveWorlds, explore the many amazing builds and worlds that are before Us all. Were rich in talent, long on hope & joy fill the days of our lives in ActiveWorlds with these beautiful things we See & seek.
|
|
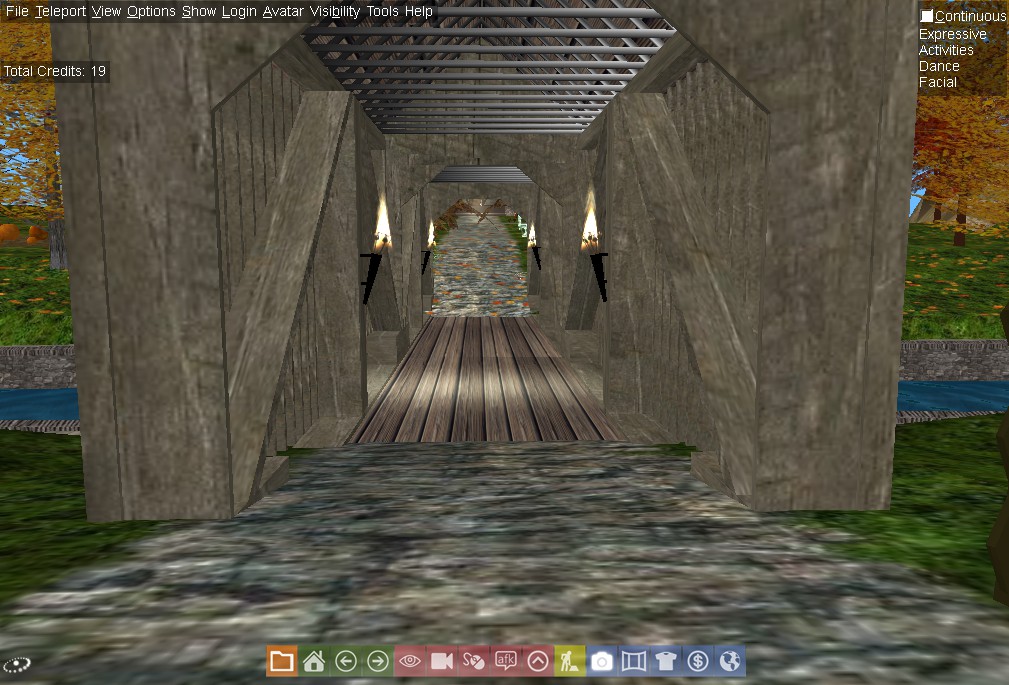
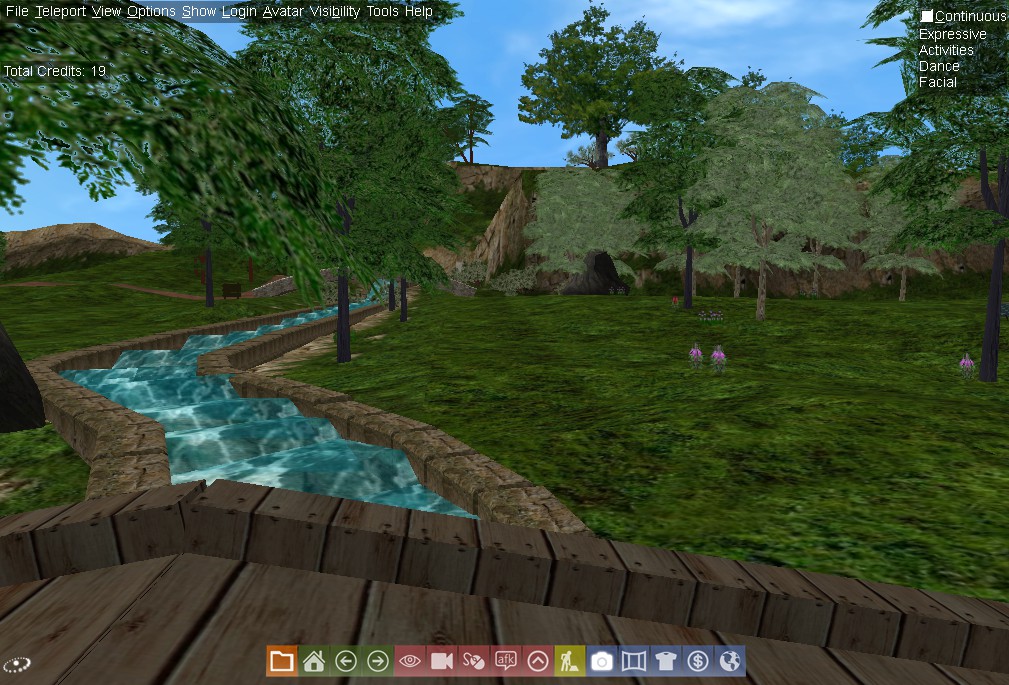
Mystery Build |
Can you find these two objects. Explore all over Alpha and other world. If you do find these objects gram me with the cords and your citizen ship name will get bragging rights.
If you have a build or a site that you would like people to find gram me and the staff will check this out. jloawsac@gmail.com |
|
 |
|
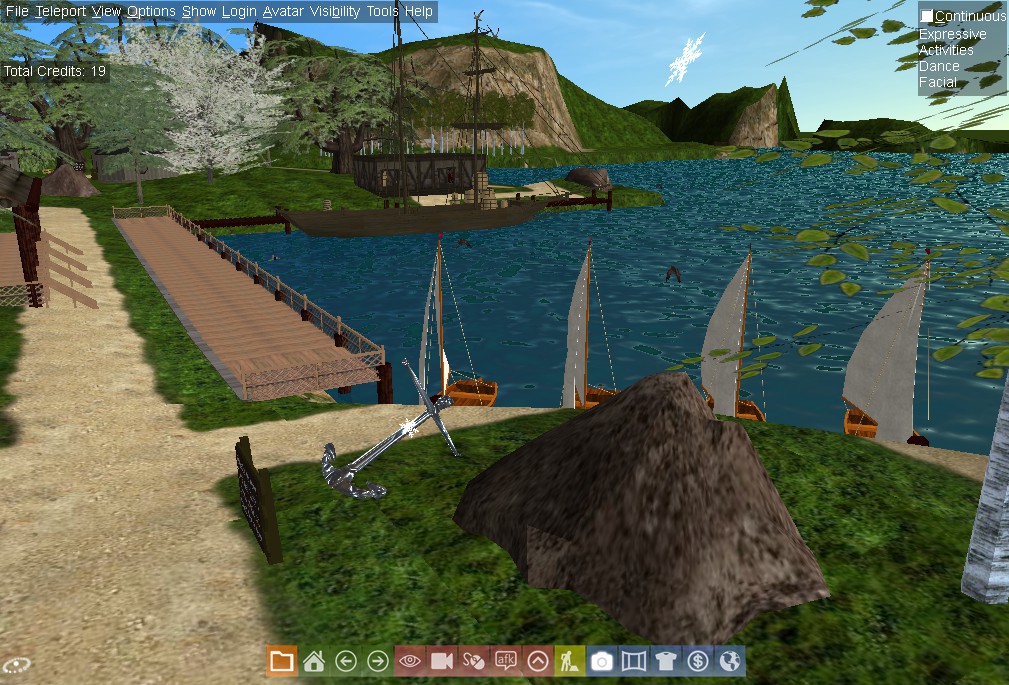
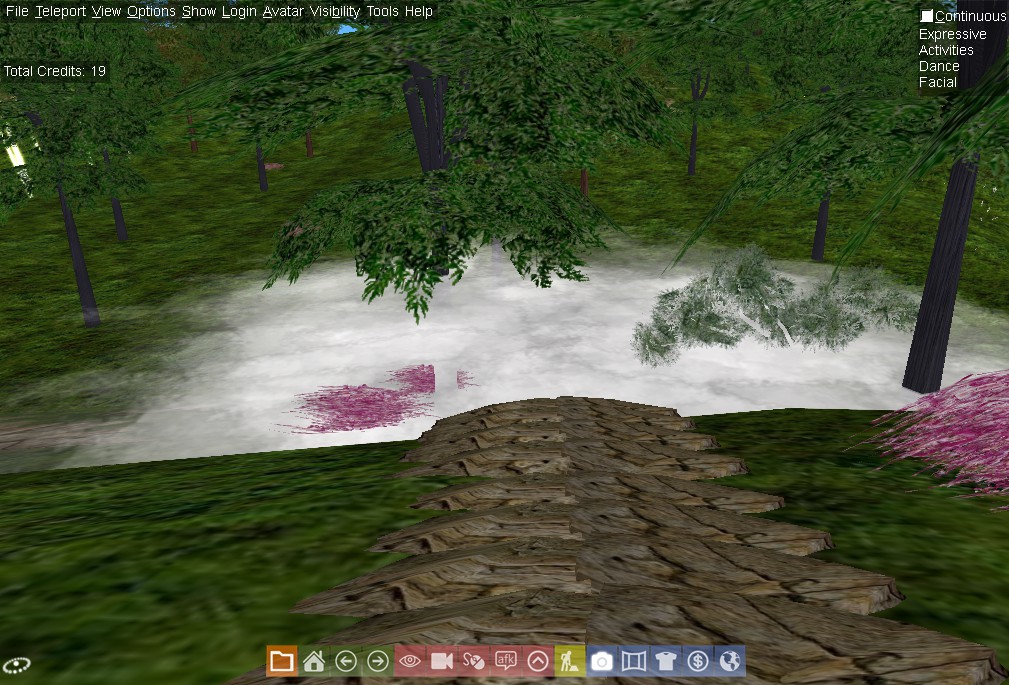
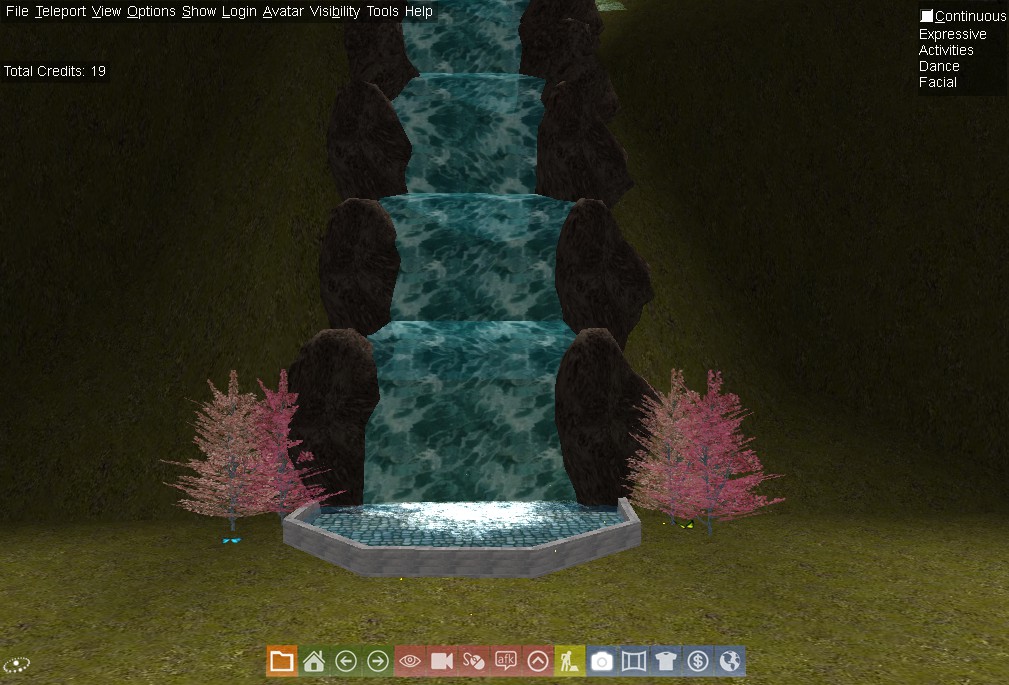
The Build of the Month |
|
|
Send us your builds and coordinates. Any description or comments you would like to add will also be greatly appreciated. Alternatively, you can email jloawsac@gmail.com.
Back to Top |
|
Virtual Spoon |
Recipes |
|
Hello from the Virtual Spoon.
Wishing you all a very Happy New Year. New Years Day Traditions around my house was the following, Watching the Rose Bowl parade and football. And taking down the Christmas Decorations and cleaning the house good to start the New Year off right. As far as the kitchen goes It was making home made corn bread for dinner, & cooking a big pot of black eye peas.
Do you know why Southern People eat Black Eye Peas On New Years Day?
New year food folk lore
* Eating black-eyed peas on New Year's Day brings good luck in the new year.
* For the best chance of luck every day in the new year, eat 365 black-eyed peas on New Year's Day.
* When served with greens (collards, mustard or turnip), black-eyed peas represent coins and greens represent paper money.
* Cornbread, often served with black-eyed peas and greens, represents gold.
* Black-eyed peas eaten with stewed tomatoes represent wealth and health.
* In Hoppin' John, each pea represents a coin, and a whole serving equals prosperity.
Others say you should leave one pea on your plate, to share your luck with someone else (more of the humbleness that peas seem to represent). Yet others say if you don't eat every pea on your plate, your luck will be bad.
It's also said that if you eat only peas, and skip the pork, collard greens, and the accompaniments, the luck won't stick. They all work together or not at all.
I hope the recipes below will help you when you can not think what shall I make for dinner. If you have a recipe you would like to share. Please send it to jloawsac@gmail.com |
Chicken & Dumplings |
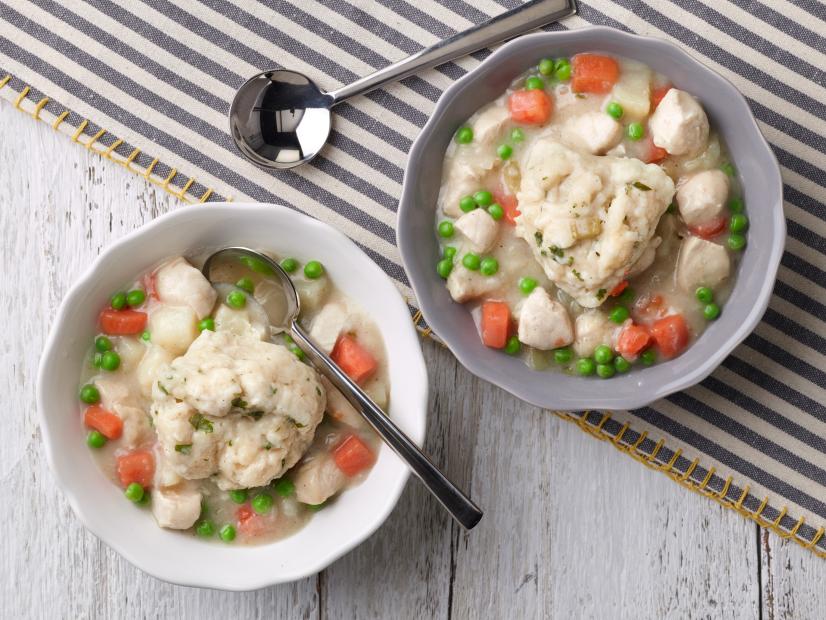 |
|
|
Level: Intermediate
Total: 40 min
Prep: 15 min
Cook: 25 min
Yield: 4 servings
Ingredients
1 1/2 pounds chicken breast tenders
1 tablespoon olive oil, 1 turn of the pan
2 tablespoons butter
1 russet potato, peeled and diced
2 medium carrots, peeled and diced or thinly sliced
1 medium onion, chopped
1 rib celery, diced
1 bay leaf, fresh or dried
Salt and freshly ground black pepper
1 teaspoon poultry seasoning, 1/3 palm full
2 tablespoons flour, a handful
1 quart chicken broth or stock, canned or paper container, preferred brand Kitchen Basics
1 small box biscuit mix(preferred brand Jiffy Mix)
1/2 cup warm water
1 cup frozen green peas
Handful flat-leaf parsley, chopped
Directions
Dice tenders into bite size pieces and set aside. Wash hands.
1. Place a large pot on stove over medium high heat. Add oil, butter, vegetables and bay leaf and cook 5 minutes, stirring frequently. Season mixture with salt, pepper and poultry seasoning. Add flour to the pan and cook 2 minutes. Stir broth or stock to the pot and bring to a boil. Add chicken to the broth and stir.
2. Place biscuit mix in a bowl. Combine with 1/2 cup warm water and parsley. Drop tablespoonfuls of prepared mix into the pot, spacing dumplings evenly.
3. Cover pot tightly and reduce heat to medium low.
4. Steam dumplings 8 to 10 minutes. Remove cover and stir chicken and dumplings to thicken sauce a bit.
5. Stir peas into the pan, remove chicken and dumplings from heat and serve in shallow bowls.
|
| Beef Stroganoff |
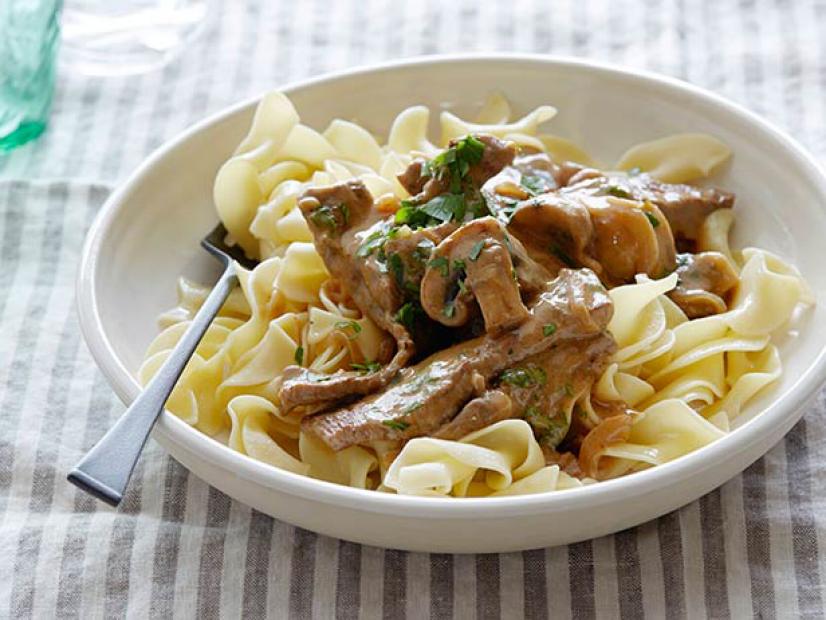 |
|
Beef Stroganoff
Level: Easy
Total: 45 min
Prep: 5 min
Cook: 40 min
Yield: 4 servings
Ingredients
1 1/2 pounds cubed round steak, cut into thin strips
House Seasoning, recipe follows
All-purpose flour
2 tablespoons olive oil
2 tablespoons butter
1 medium onion, sliced
8 ounces fresh mushrooms, sliced
1 (10 3/4-ounce) can beef broth
1 (10 3/4-ounce) can cream of mushroom soup
Salt and black pepper
1 cup sour cream
Cooked egg noodles
Directions
1. Sprinkle the steak strips with House Seasoning, and then dust with flour. In a large skillet, quickly brown them on both sides in the olive oil and butter. Remove the steak from the pan. Add the onion slices and mushrooms to the pan drippings. Saute for a few minutes, until the onion is tender. Sprinkle with 1 teaspoon flour. Put the steak back into the pan with the onion and mushrooms. Add the mushroom soup and beef broth.
2. Cook over low heat for about 30 minutes, covered. Adjust seasoning to taste, adding salt and pepper, as needed.
3. Stir in the sour cream the last few minutes, right before you serve. Serve over cooked noodles.
House Seasoning:
Yield: 1 1/2 cups
1. Mix the ingredients together and store in an airtight container for up to 6 months.
|
The Best M&M Cookies |
 |
Level: Easy
Total: 2 hr 20 min (includes chilling time)
Active: 30 min
Yield: about 24 cookies
Ingredients
2 3/4 cups all-purpose flour (see Cook's Note)
1 1/2 teaspoons baking powder
1 teaspoon baking soda
1 teaspoon kosher salt
2 1/2 sticks (1 1/4 cup) unsalted butter, softened
1 3/4 cup packed dark brown sugar
1/4 cup granulated sugar
2 large eggs, at room temperature
2 teaspoons pure vanilla extract
2 cups candy-coated chocolates, such as M&M's
Directions
1. Sift the flour, baking powder, baking soda and salt into a large bowl.
2. Beat the butter, brown sugar and granulated sugar in a bowl with a mixer on medium-high speed until pale and fluffy, about 4 minutes. Beat in the eggs one at a time until smooth, then beat in the vanilla. Reduce the mixer speed to low. Add the flour mixture and beat until combined. Reserve 1/4 cup of the chocolates, then stir in the remaining 1 3/4 cups of chocolates by hand. Press plastic wrap directly onto the surface of the dough and refrigerate until chilled through, about 1 hour.
3. Arrange the racks in the upper and lower third of the oven and preheat to 350 degrees F. Line 2 baking sheets with parchment paper.
4. Roll the dough into 24 balls, each about 3 tablespoons (alternatively, use a #20 large cookie scoop). Place 6 dough balls on each of the prepared baking sheets; stud the top of each dough ball with some of the reserved chocolates. Bake 2 trays at a time until the cookies are golden around the edges but still soft in the middle, rotating the trays halfway through, 15 to 18 minutes. Remove from the oven and let cool 10 minutes on the baking sheets, then transfer to wire racks to cool completely. Repeat with the remaining dough and chocolates.
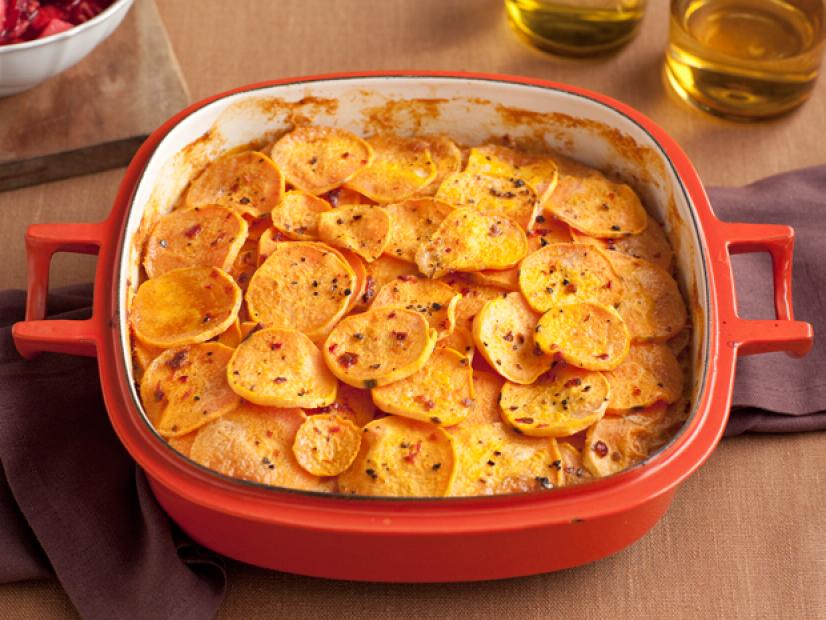
Smoked Chile Scalloped Sweet Potatoes
Level: Easy
Total: 1 hr 25 min
Prep: 10 min
Cook: 1 hr 15 min
Yield: 4 to 6 servings
Ingredients
2 cups heavy cream
1 heaping tablespoon chipotle pepper puree
3 medium sweet potatoes, peeled and thinly sliced 1/8-inch thick
Salt and freshly ground black pepper
Preheat oven to 375 degrees F.
1. Whisk together cream and chipotle puree until smooth.
2. In a 9 by 9-inch casserole dish, arrange the potatoes in even layers. Drizzle with 3 tablespoons of the cream mixture and season with salt and pepper. Repeat with the remaining potatoes, cream, and salt and pepper to form 10 layers.
3. Cover and bake for 30 minutes, remove cover and continue baking for 45 minutes to 1 hour, or until the cream has been absorbed and the potatoes are cooked through and the top is browned.
|
|
Chocolate Snowball Cookies |
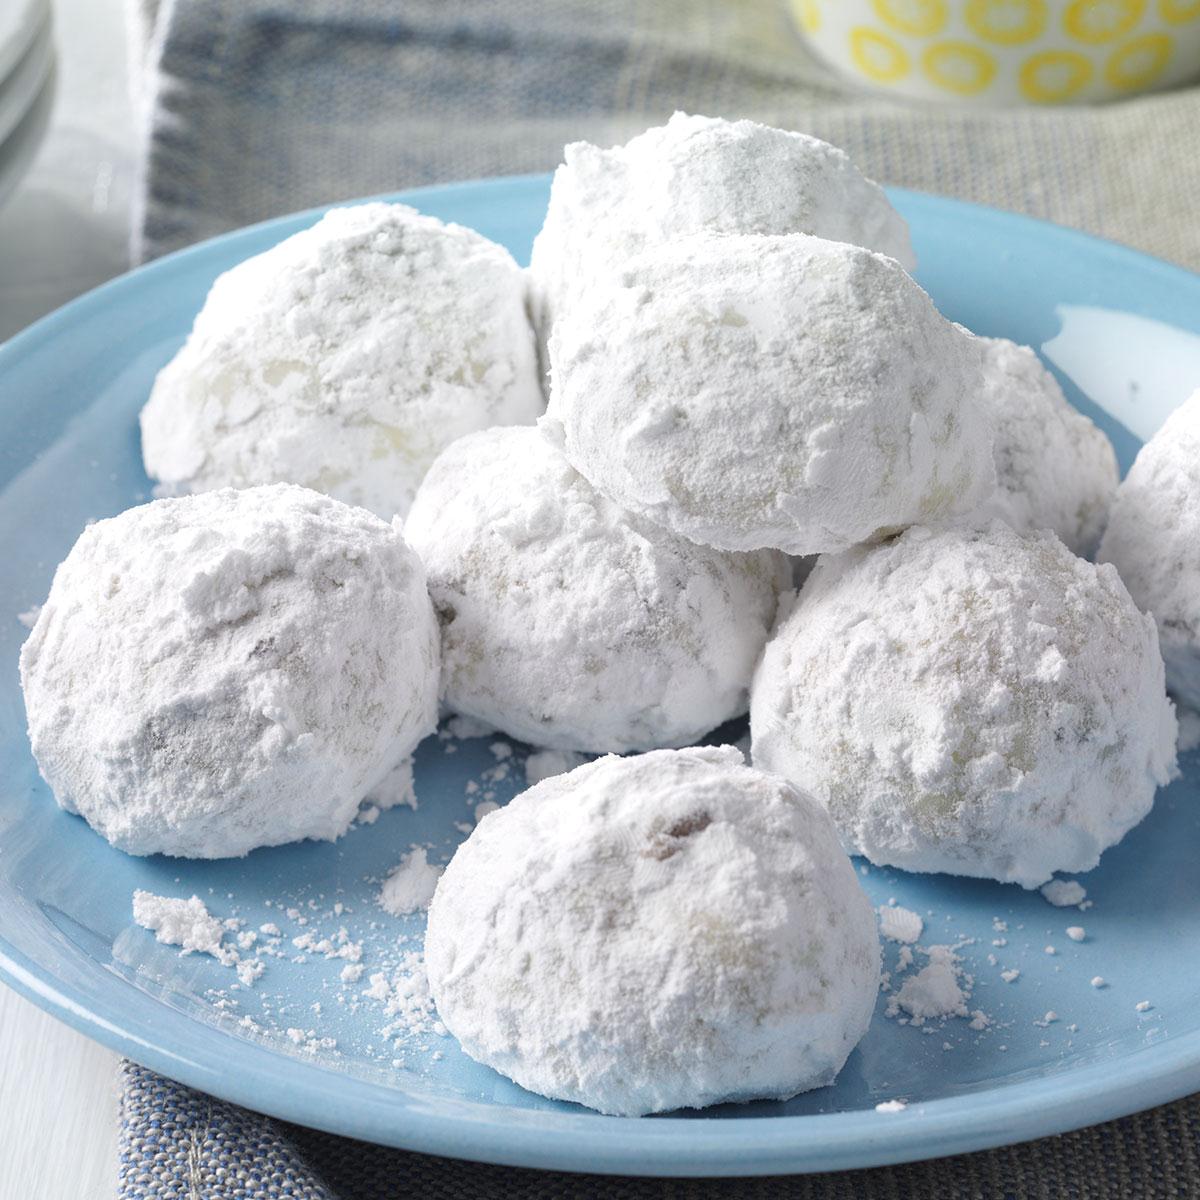 |
|
Ingredients
3/4 cup butter, softened
1/2 cup sugar
1/2 teaspoon salt
1 large egg, room temperature
2 teaspoons vanilla extract
2 cups all-purpose flour
1 cup chopped pecans or walnuts
1 cup (6 ounces) chocolate chips
Confectioners' sugar
Directions
1. Preheat oven to 350°. In a large bowl, cream butter, sugar and salt until light and fluffy. Beat in egg and vanilla. Gradually beat in flour. Stir in pecans and chocolate chips.
2. Shape dough into 1-in. balls; place 2 in. apart on ungreased baking sheets. Bake until set and bottoms are lightly browned, 15-20 minutes. Cool on pans 2 minutes. Roll warm cookies in confectioners' sugar. Cool completely on wire racks. If desired, reroll cookies in confectioners' sugar.
|
|
| Shrimp and Scallop Scampi with Linguine |
 |
|
Instant Pot Scalloped Potatoes
When you don't have a lot of time and the people in your house hold are screaming when is dinner “I am hungry” already or they say “are WE ever going to eat, Any time soon? A Instant Pot is a good thing to have. So just what is a instant pot. A instant pot replaces up to 7 appliances , saves space including a pressure cooker slower cooker , rice cooker , steamer and more. And it will make yogurt for the morning rush out the door to work or school. It will also monitor the pressure, the temperature, keeps time & adjusts the heating intensity. Prepares dishes 70 per cent faster. Easy to clean dishwasher safe
Instant Pot DUO60 6 Qt 7-in-1 Multi-Use Programmable Pressure Cooker, Slow Cooker, Rice Cooker, Steamer, Sauté, Yogurt Maker And Warmer is the one to look for at Khols are Amazon or Walmart.
These Instant Pot scalloped potatoes are a quick and easy preparation, and they're ready after only 35 minutes of cooking time (allow about 12 to 14 minutes for the pot to build pressure). Just release the pressure when the time is up and finish them under the oven broiler. Your scalloped potatoes will look and taste as if they baked for an hour in the oven.
Feel free to omit the onion in the recipe or add 2 cloves of finely minced garlic. The recipe calls for cheddar cheese, but a combination of cheddar and mozzarella is good as well. Or use Monterey Jack or Colby cheese.
A 7-by-2-inch baking pan is a perfect size for the 6-quart Instant Pot, or use an 8-by-2-inch pan in the 8-quart pot. If possible, use a mamandoline or the slicing disk of a food processor for uniform, thinly sliced potatoes. A thickness of about 1/8-inch or just slightly thicker is ideal.
Ingredients
1 1/2 pounds potatoes (russets or Yukon Gold)
3 tablespoons onion (finely chopped)
1 1/2 cups cheddar cheese (divided)
3/4 teaspoon kosher salt
1/2 teaspoon ground black pepper
Dash nutmeg (freshly grated or ground)
1 cup heavy cream
1 cup whole milk (or half-and-half)
2 tablespoons all-purpose flour
Optional garnish: chopped chives or parsley
Steps to Make It
Gather the ingredients.
1. Peel the potatoes and slice them into 1/8-inch to 1/4-inch rounds.
2. Butter a 7-by-2-inch baking pan (or one that will fit in the Instant Pot with the trivet).
3. Arrange a layer of potatoes in the bottom of the pan. Follow the potato layer with about 1 tablespoon of finely chopped onion, a few tablespoons of cheddar cheese, and a sprinkling of the salt, pepper, and nutmeg.
4. Repeat the layers two times and then finish with another layer of potatoes, a sprinkling of salt and pepper, and a few tablespoons of cheddar cheese. Don't fill the pan completely; there should be at least 1/2-inch of head space.
5. In a bowl, whisk the cream and milk with the flour. Pour the cream and milk over the potatoes. The mixture should come almost—but not quite—to the top of the potatoes.
6. Add 1 1/2 cups of water to the Instant Pot.
7. Place the uncovered baking pan on the trivet. Holding the trivet handles, lower it into the Instant Pot.
8. Lock the Instant Pot lid in place and set the vent to sealing.
9. Using the manual setting, choose high pressure for 30 minutes.
10. When the time is up, release the pressure quickly.
11. Grasp the trivet handles and carefully lift the pan of scalloped potatoes out of the cooker.
12. Sprinkle the remaining cheddar cheese over the potatoes and place the pan on a baking sheet.
13. Position an oven rack about 6 to 8 inches below the broiler. Preheat the broiler for about 5 to 10 minutes.
14. Broil the scalloped potatoes for about 3 to 5 minutes, or until golden brown. If necessary, rotate the pan for even browning.
15. Garnish with chives or parsley, as desired, and serve hot.
16. Enjoy!
Tips The potatoes will take longer if the slices are thick or layered in a deeper pan. If, after the quick release, the potatoes are still too firm, return the pan to the cooker and time them for 3 to 5 minutes longer.
Russets or Yukon Gold potatoes are both good choices for this recipe. The starchier russets will break down a bit and make the sauce creamier, while moderate-starch Yukon Gold potatoes will hold their shape better. |
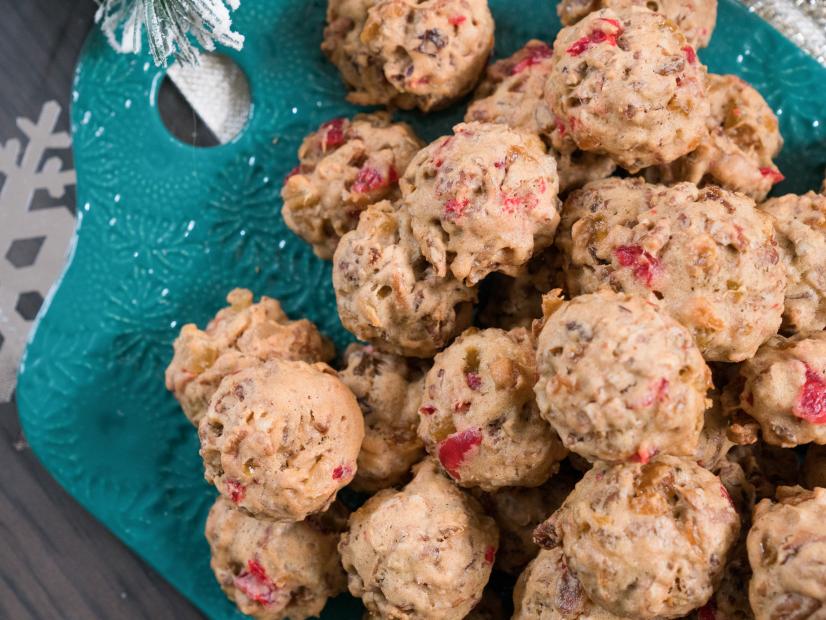
Fruitcake Cookies |
 |
Level: Easy
Total: 40 min
Active: 15 min
Yield: 2 dozen cookies
Ingredients
1 1/2 cups all-purpose flour
1/2 teaspoon baking soda
1/2 teaspoon ground cinnamon
1/2 cup (1 stick) butter, room temperature
1/2 cup packed light brown sugar
2 large eggs, lightly beaten
1/4 cup whole milk
3 1/2 cups coarsely chopped pecans
1 cup candied cherries, chopped
3 slices candied pineapple, chopped
Half of a 15-ounce box golden raisins, chopped
Sift together the flour, baking soda and cinnamon in a bowl.
Cream the butter and sugar in a separate bowl, then gradually add the eggs. Add the dry ingredients alternately with the milk, blending well.
Mix the pecans, cherries, pineapple and raisins in a large bowl, then pour the batter over them. Fold the fruit and nuts into the batter by hand, mixing well. Drop the batter by tablespoonfuls onto the prepared cookie sheets.
Bake for 20 to 25 minutes, or until golden and done.
|
| |
|
|
|
Virtual Fork |
Zucchini & Pesto
|
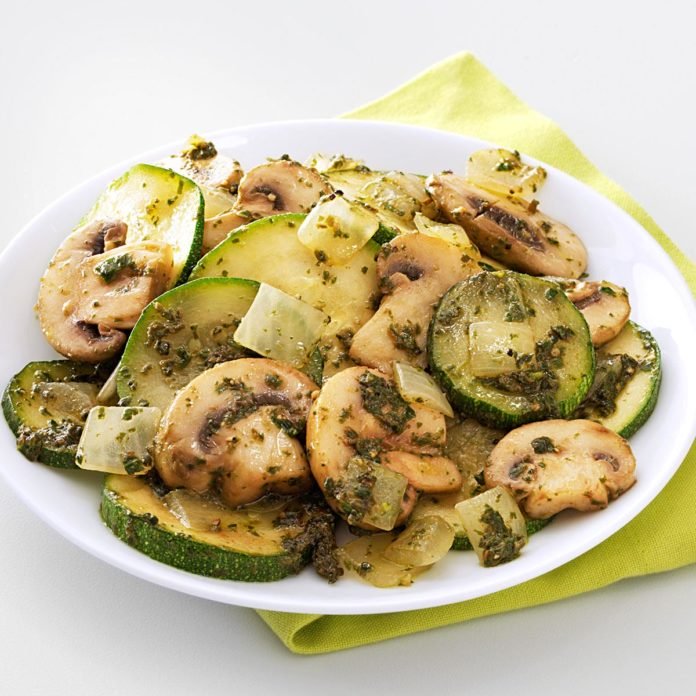 |
This time it"s a quick and easy recipe, which is useful if you want to spend a bit more time in Activeworlds :).
The quantities are calculated for 1 person
Take ½ courgette (zucchini) and cut it into pieces, put them in a pan with some water and cook the courgettes with olive oil or butter until they are soft.
Meanwhile cook a pot of water with 2 handfuls of short macaroni or penne or farfalle pasta. Pour the water away and keep the pasta warm
Meanwhile take also another pan with olive oil or butter and bake in here the meat of your choice (i chose a chicken cutlet with mushroom filling).
Then take another pan where you bake some mushrooms during a few minutes.
Serve the 4 ingredients on a plate.
Finally add 2 or 3 teaspoons of pesto sauce to the pasta (you can buy pesto in small jars. Green pesto is made with basil, and red pesto is made of dried tomatoes) . I chose green pesto this time, and finally stir the green pesto in the warm pasta.
Enjoy your meal !
|
|
F.Y.I. |
Activeworlds update |
A Happy New Year 2020 to all Active Worlders in the 3rd Decade of Activeworlds
In December 2019 Activeworlds 6.6 received some Feature Updates. These were, aside of the obligatory CEF / Chromium updates, an additional option to the rotate action command, and fixes towards continuous avatar animation playback.
Many thanks to Gremot and Panne for testing the new features for 14 days.
The long time issue with e.g. sit animation sequences has been fixed, that avatars stay sit continuously for observers.
The rotate action command got a pivot option to define offcenter rotations of an object inworld. Here is an example:
activate rotate 4 pivot="-3.5 0 0“
This will rotate the object around the Y axes (points upwards) with an offset in the X axes (points west / east).
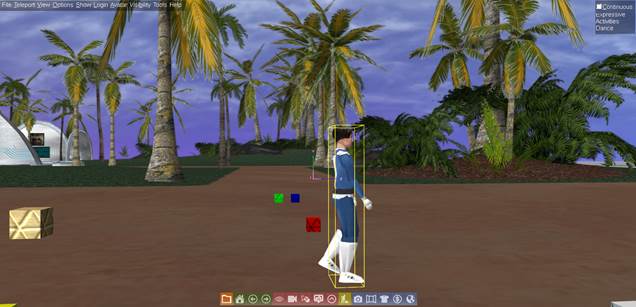
Selected object shown in offset to the building axes.
The pivot option is given in meters telling the offset of the object's native rotation center in world coordinates. In the above example the avatar walks in a circle with a radius of 3.5 meters.
|
The Marketplace |
Where to obtain Products & Services in Activeworlds |
 |
Back to Top
|
 |
|
The Peacekeepers have been a strong and loyal organisation for over two decades. We are here mainly to help ensure that being in Activeworlds is a fun and safe environment for everyone. We also like to help and assist if/when the need arises.
I became a Peacekeeper December 1999. The times were different and the ground zeros were manicly busy – we were certainly kept on our toes, so much so that to take your eyes from the keyboard for one second was just impossible. My family knew not to try and distract me when I was on shift and regularly brought me tea and coffee, knowing I couldn’t leave the computer.
In the early days I was scared to death and was thankful when my then team leader, Miksam, was online with me to hold my hands if things went belly up!
Good days! Yet who says we won’t have those days back again? Activeworlds was the first ever virtual world on the internet. It has outlived many rivals and is still going comparatively strong.
SO we need more Peacekeepers – we need a new generation who will make their own history and who will help shape the Peackeepers for the future.
After training we only ask for one hour of your time a week on patrol..you can do more if you want! Not too much to ask?
So do you need training? Sure you do but it isn’t so scary. Our training is second to none and encompasses:
Computer security, Browser Training, PK Document training, Report training (we write a few and are accountable for any eject we have to do) Garbage training i.e how to handle a case of vandalism, Tactical Training which involves ejects, and harassments within AW, Bots and how to handle our renown PK bots in worlds.
Lastly we have the Sims. This is where each PK trainee gets to put what they have learned into practice when they are faced with angry and misbehaving citizens. You even get to eject known PK’s..me included! Such fun so what are you waiting for? Give us a go..you trial us and we will trial you! It’s fun!
If you are over 18 and have been in Activeworlds for six months then send us a quick application form to https://peacekeeper.net/application.php
See you in world! PK20/GolderUK/PKCore |
|
Build Tips |
Peacekeeper Tips – Finding lost stuff
|
 Lensman -Often when citizens return with a new upload of AW, they donot Lensman -Often when citizens return with a new upload of AW, they donot  have the teleports they once had. Many have no idea where they left their old builds. Further, there are two conditions. The first is that the returning citizen does not remember the old citizen number. It is possible to locate the citizen number, but only if the returning citizen remembers what the citizen's name was. It is possible to find a citizen number using the citizen finder at this link: Citizen Numbers have the teleports they once had. Many have no idea where they left their old builds. Further, there are two conditions. The first is that the returning citizen does not remember the old citizen number. It is possible to locate the citizen number, but only if the returning citizen remembers what the citizen's name was. It is possible to find a citizen number using the citizen finder at this link: Citizen Numbers
You will see a long list of numbers and names. The sorted list is in account number, not citizen name, so you may have to search for quite a while. Anyway, armed with a citizen name and number, it is then possible to use the AW Property Finder.
If the returning citizen wishes to continue to build using the old account, they must also remember the password. If the password is lost, it is possible to request a new password from AWI,
and for that, you need the original email address associated with the account and this web address. Support Inquiry
If you know the privilege password for the old account, you can use that to build on the old account with a new one.
Be advised that it may take some time for AWI to respond.
|
Places to visit |
The Army Family Support Center was a winner in the 2010 Federal Virtual World Challenge sponsored by the United States Army Research Engineering and Development Command (REDCOM) located in Orlando, Florida. The information is current, although graphics are undergoing some upgrades due to originally being hosted on Photobucket. If you know anyone in the Army who is deployed and left a wife behind not near a military base, please tell them about this resource. aw 5005.43S 10060.23W 0.63a
Back to top |
|
The Garden |
Forcing Spring Bulbs for Winter Bloom Indoors |
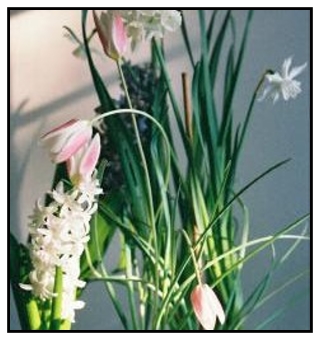 Ann Joy and Brian Hudelson, UW-Madison Plant Pathology - Northern gardeners do not have to give up growing flowers during the long winter months. Many plants grown from bulbs (also those grown from corms or rhizomes) can be forced to bloom indoors during the winter by giving them the combination of cold and dark conditions that they require to break dormancy, develop roots, and flower. If you can spare a corner of your refrigerator, you can enjoy flowering hyacinths, narcissus, tulips, crocus, or other spring-flowering plants during the winter.
What plants should I select? Look for varieties that are specifically recommended for forcing. Select top quality bulbs with no soft spots. DO NOT purchase bulbs that are damaged. When selecting bulbs to force, keep in mind that late-blooming varieties need longer cold treatments than early-blooming varieties. Also remember that taller varieties may need to be staked, and thus may not be appropriate in all settings.
How do I plant my bulbs? Plant bulbs from September through November for indoor bloom. Use plastic or preferably clay containers with drainage holes. Proper drainage is crucial for forcing bulbs. Use a potting mix that is equal parts soil, sharp builder’s sand, and peat moss. Partially fill containers with potting mix, arrange bulbs so that their necks will be at or just below the surface, and gently add more potting mix around the bulbs. Amaryllis bulbs can be planted with the top 1/3 of the bulb above the level of the potting mix. Smaller bulbs like grape hyacinth and crocus may be covered by one half to one inch of the potting mix. Separate bulbs by about half a bulb width. A container that is six inches wide and six inches deep will hold roughly 10 to 12 crocus, five tulip, four hyacinth, or three to five narcissus bulbs. Plant bulbs that have one flat side (e.g., tulip bulbs) with the flat side facing the outside of the pot. This will yield a display of large leaves towards the outside of the pot, surrounding the flower stalks. Fertilizing bulbs is not necessary, but be sure to water your bulbs if the potting mix is very dry and add potting mix as needed if settling occurs. Bulbs require some moisture during their cold treatment, but too much moisture can promote growth of rot fungi. If the potting mix in your pots is overly wet, allow it to dry a bit before beginning the cold treatment.
Hyacinths and paperwhite narcissus can be grown without potting mix. Hyacinths are often grown in special glass containers shaped to hold a single bulb, but any container with a neck narrow enough to suspend a bulb over water will work. Paperwhite narcissus bulbs can be grown on sand, gravel, pebbles or marbles. Place whatever material you select around the bulbs high enough to support them and keep them upright. Space bulbs as described above. For both hyacinths and paperwhite narcissus grown without potting mix, add water to the container, keeping the water level just below the bottom of the bulbs. If water touches the bulbs, they will rot.
How do I get my bulbs to bloom? Most bulbs require cold and dark conditions that simulate winter conditions in order to bloom. However, amaryllis and paperwhite narcissus bulbs do not require a cold treatment. Cold treatment guidelines for several bulb species are given in Table 1.
Ideally, temperatures should decrease gradually. Bulbs should spend the first three to five weeks developing roots at 45 to 50ºF, followed by about three weeks at 38 to 42ºF, and the remainder of their cold period at about 35ºF. However, the constant temperature of a home refrigerator (typically between 35 and 45ºF) also works. Be sure NOT to store fruit (particularly apples) in the refrigerator while forcing bulbs as ethylene gas released from fruit impairs flower development. Also be sure to shield the bulbs from light. Check moisture every few weeks. If the potting mix is very dry, add a small amount of water. When the cold period is complete, the bulbs should have shoots that are one to two inches tall. Bring sprouted bulbs out of refrigeration into a sunny spot where the temperature is between 55 and 60ºF. Shoots initially will be white, but will turn green when the bulbs are brought into the light. Most bulbs will bloom about three to four weeks after they are removed from the cold. Amaryllis bulbs will bloom six to eight weeks after planting. At warmer temperatures, bulbs may grow faster, but flowers will not last as long. Keep bulbs moist, but not overly wet. Bulbs will require more water as leaves begin to grow rapidly.
What do I do with my bulbs after they have bloomed? Hyacinths, narcissus, tulips, and crocus cannot be forced two years in a row. However, bulbs that have been grown indoors in potting mix can be planted in the garden. Keep the bulbs in pots through the spring and summer, watering and fertilizing them regularly until they naturally die back. In the autumn, plant the bulbs in your garden at the recommended depth. The bulbs may bloom the following spring, but most likely will need a year of leaf growth before they rebloom. Bulbs grown without potting mix exhaust their resources and often won’t bloom again, even in the garden.
To get an amaryllis to bloom again, it is important to allow the bulb to store food during its growing season and then give it a dry dormant period. After bloom, remove the flowers, give the plant plenty of sunlight, and fertilize it. Stop watering in early September and allow the plant to dry out completely. The foliage will die back. If taken outside during the summer, bring the plant inside before frost. Starting in November or December, begin to water the bulb again to repeat the blooming cycle. You may want to consider repotting your amaryllis bulb every few years, but only into a pot no more than one to two inches wider than the diameter of the bulb.
Keeping a log. Keep records of the varieties that you force, the length and temperature of cold treatment, and weeks until bloom after cold treatment. This information can provide a valuable reference for your future winter horticulture endeavors. Ann Joy and Brian Hudelson, UW-Madison Plant Pathology - Northern gardeners do not have to give up growing flowers during the long winter months. Many plants grown from bulbs (also those grown from corms or rhizomes) can be forced to bloom indoors during the winter by giving them the combination of cold and dark conditions that they require to break dormancy, develop roots, and flower. If you can spare a corner of your refrigerator, you can enjoy flowering hyacinths, narcissus, tulips, crocus, or other spring-flowering plants during the winter.
What plants should I select? Look for varieties that are specifically recommended for forcing. Select top quality bulbs with no soft spots. DO NOT purchase bulbs that are damaged. When selecting bulbs to force, keep in mind that late-blooming varieties need longer cold treatments than early-blooming varieties. Also remember that taller varieties may need to be staked, and thus may not be appropriate in all settings.
How do I plant my bulbs? Plant bulbs from September through November for indoor bloom. Use plastic or preferably clay containers with drainage holes. Proper drainage is crucial for forcing bulbs. Use a potting mix that is equal parts soil, sharp builder’s sand, and peat moss. Partially fill containers with potting mix, arrange bulbs so that their necks will be at or just below the surface, and gently add more potting mix around the bulbs. Amaryllis bulbs can be planted with the top 1/3 of the bulb above the level of the potting mix. Smaller bulbs like grape hyacinth and crocus may be covered by one half to one inch of the potting mix. Separate bulbs by about half a bulb width. A container that is six inches wide and six inches deep will hold roughly 10 to 12 crocus, five tulip, four hyacinth, or three to five narcissus bulbs. Plant bulbs that have one flat side (e.g., tulip bulbs) with the flat side facing the outside of the pot. This will yield a display of large leaves towards the outside of the pot, surrounding the flower stalks. Fertilizing bulbs is not necessary, but be sure to water your bulbs if the potting mix is very dry and add potting mix as needed if settling occurs. Bulbs require some moisture during their cold treatment, but too much moisture can promote growth of rot fungi. If the potting mix in your pots is overly wet, allow it to dry a bit before beginning the cold treatment.
Hyacinths and paperwhite narcissus can be grown without potting mix. Hyacinths are often grown in special glass containers shaped to hold a single bulb, but any container with a neck narrow enough to suspend a bulb over water will work. Paperwhite narcissus bulbs can be grown on sand, gravel, pebbles or marbles. Place whatever material you select around the bulbs high enough to support them and keep them upright. Space bulbs as described above. For both hyacinths and paperwhite narcissus grown without potting mix, add water to the container, keeping the water level just below the bottom of the bulbs. If water touches the bulbs, they will rot.
How do I get my bulbs to bloom? Most bulbs require cold and dark conditions that simulate winter conditions in order to bloom. However, amaryllis and paperwhite narcissus bulbs do not require a cold treatment. Cold treatment guidelines for several bulb species are given in Table 1.
Ideally, temperatures should decrease gradually. Bulbs should spend the first three to five weeks developing roots at 45 to 50ºF, followed by about three weeks at 38 to 42ºF, and the remainder of their cold period at about 35ºF. However, the constant temperature of a home refrigerator (typically between 35 and 45ºF) also works. Be sure NOT to store fruit (particularly apples) in the refrigerator while forcing bulbs as ethylene gas released from fruit impairs flower development. Also be sure to shield the bulbs from light. Check moisture every few weeks. If the potting mix is very dry, add a small amount of water. When the cold period is complete, the bulbs should have shoots that are one to two inches tall. Bring sprouted bulbs out of refrigeration into a sunny spot where the temperature is between 55 and 60ºF. Shoots initially will be white, but will turn green when the bulbs are brought into the light. Most bulbs will bloom about three to four weeks after they are removed from the cold. Amaryllis bulbs will bloom six to eight weeks after planting. At warmer temperatures, bulbs may grow faster, but flowers will not last as long. Keep bulbs moist, but not overly wet. Bulbs will require more water as leaves begin to grow rapidly.
What do I do with my bulbs after they have bloomed? Hyacinths, narcissus, tulips, and crocus cannot be forced two years in a row. However, bulbs that have been grown indoors in potting mix can be planted in the garden. Keep the bulbs in pots through the spring and summer, watering and fertilizing them regularly until they naturally die back. In the autumn, plant the bulbs in your garden at the recommended depth. The bulbs may bloom the following spring, but most likely will need a year of leaf growth before they rebloom. Bulbs grown without potting mix exhaust their resources and often won’t bloom again, even in the garden.
To get an amaryllis to bloom again, it is important to allow the bulb to store food during its growing season and then give it a dry dormant period. After bloom, remove the flowers, give the plant plenty of sunlight, and fertilize it. Stop watering in early September and allow the plant to dry out completely. The foliage will die back. If taken outside during the summer, bring the plant inside before frost. Starting in November or December, begin to water the bulb again to repeat the blooming cycle. You may want to consider repotting your amaryllis bulb every few years, but only into a pot no more than one to two inches wider than the diameter of the bulb.
Keeping a log. Keep records of the varieties that you force, the length and temperature of cold treatment, and weeks until bloom after cold treatment. This information can provide a valuable reference for your future winter horticulture endeavors.
Back to Top |
Growing Mushrooms at Home |
|
Growing Mushrooms
University of Florida - For mushroom lovers, the idea of growing these fabulous fungi at home can be exciting and intimidating. Shiitake mushrooms and oyster mushrooms are two great types for the beginning home mushroom grower to try. Shiitake mushrooms, while often found in stores, are much cheaper to grow at home. Oyster mushrooms are less common in stores because of their delicate, hard-to-ship nature.
Purchasing a mushroom cultivation kit is the easiest way to start growing your own mushrooms at home. Oyster mushrooms (Pleurotus ostreatus) or Shiitake mushrooms (Lentinula edodes) are great choices for first timers because they are delicious and are some of the easiest to grow.
How you grow your mushrooms will depend on the kit you buy. But don’t worry; they should come with instructions to help you get started.
A Little About Mushrooms
The parts of the mushrooms that we eat are actually the fruiting (reproductive) bodies of fungi. Growing mushrooms is quite different from growing plants. Since mushrooms are not capable of photosynthesis and producing their own food like plants, mushrooms depend on a substrate, material on which the mushrooms grow. Logs, straw, or other cellulose sources are some examples. The mushrooms take nutrients from the substrate as it decomposes. Growing mushrooms indoors is generally preferred since it will provide you more continuous and predictable fruiting.
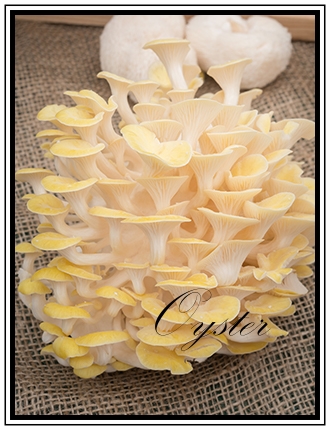
Oyster Mushrooms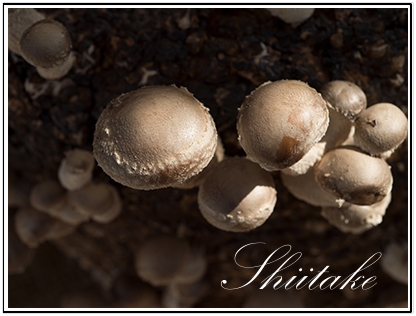
Oyster mushrooms are delicate, with a flavor that is milder than Shiitakes. You aren’t likely to see these in stores simply because they don’t ship well. Colors will vary with the different strains but you can have oyster mushrooms that are tan, cream, grey, pink, or yellow.
Generally, oyster mushroom growing kits will come with a mass of sticky white mycelium (the thread-like, non-reproductive starter part of mushrooms) that has colonized a tower of straw inside of a perforated plastic bag. After soaking, mushrooms will form on the outside and should be ready for harvest in just about a month.
Shiitake Mushrooms
Shiitake mushrooms have a full, smoky flavor and a dense texture that holds up well for cooking. They're easily found in stores, but you can likely grow them much more inexpensively at home. Growing Shiitakes at home is rewarding. It might take a bit of time to get started, but once you’re going they can produce sporadic flushes. Choosing your substrate is a very important part of growing Shiitake mushrooms. If growing on hardwood logs, Shiitakes can be produced for 3 to 5 years once the wood has been inoculated with mushroom spawn.
Shiitake mushrooms growing on a log substrate. USDA photo by Lance Cheung.
Once you get the hang of growing mushrooms you can try your hand at purchasing spawn that will grow on other materials, such as sawdust and even shredded paper. You may even want to try some different—and potentially more challenging—mushroom types like chanterelle (Chantharellus cibarius), “yellow” morel (Morchella esculenta), and field mushrooms (Agaricus campestris).
For more information on growing your own mushrooms, contact your local County Extension Office. Back to Top |
| |
|
| |
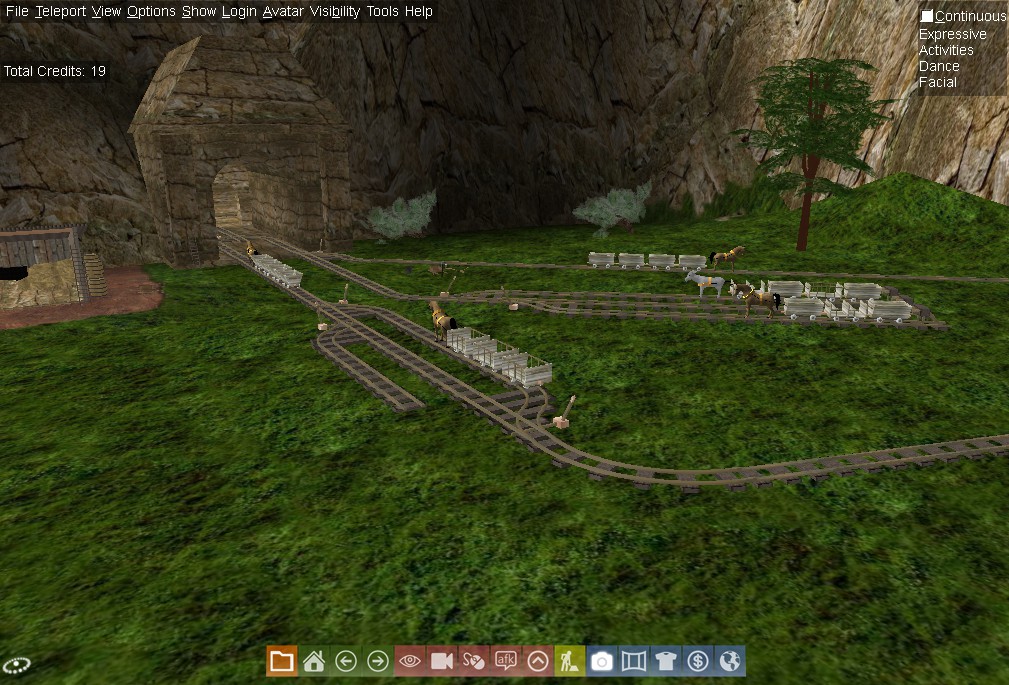
Worlds To Watch
|
| |
Secret Space, Shokan, Space |
| |
|
Secret Space |
|
Shokan |
|
Space |
|
|
| |
|
| |
Tackle Tech |
| |
Photoshop Tutorials |
| |
A designer's toolbox can never be full! Especially because some resources are hard to find or don't exist yet, so you have to make them yourself. Today, you will learn how you can make your own seamless grass pattern using a single photo and the default Photoshop tools. |
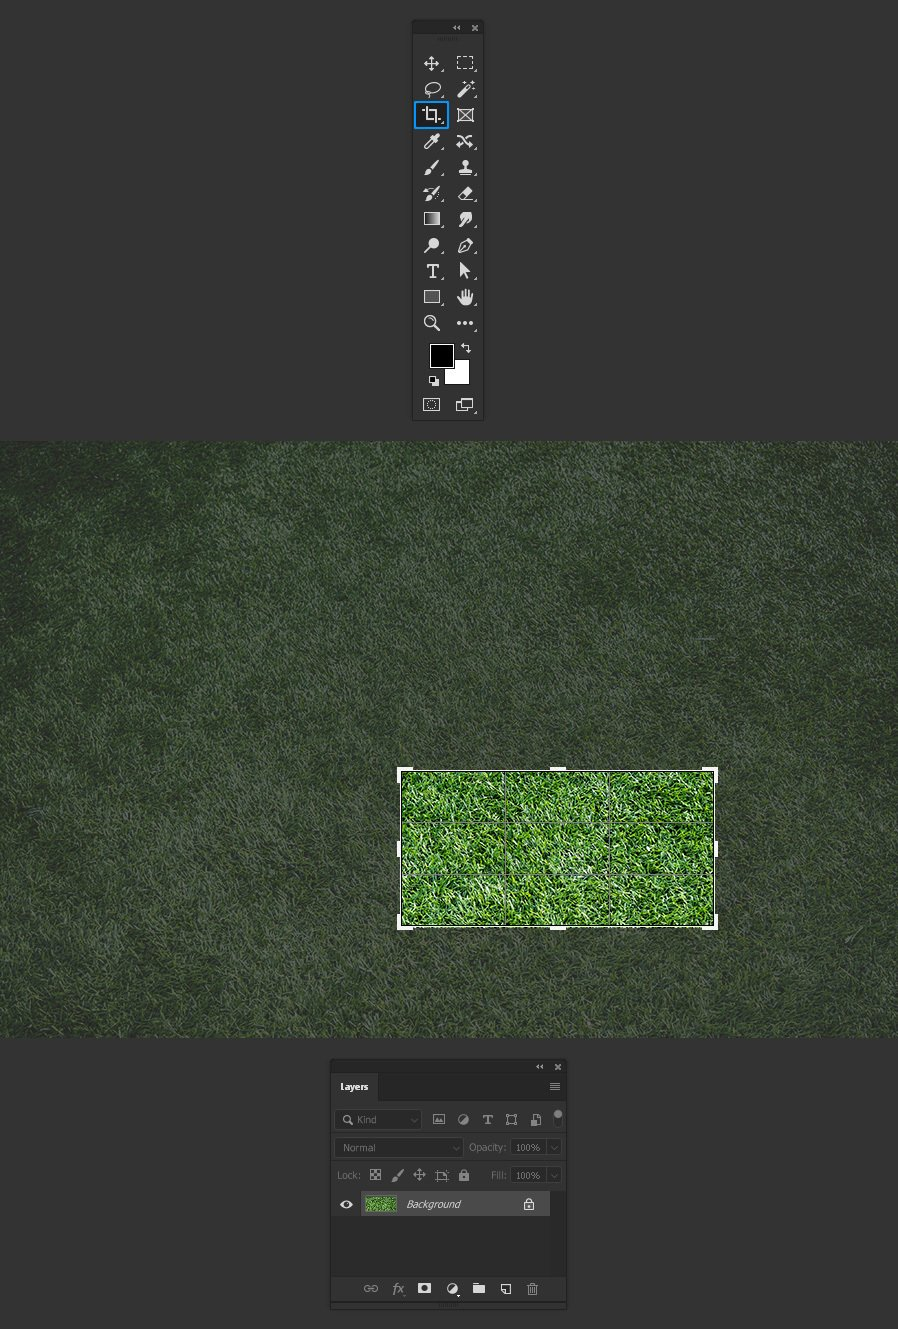
| Step 1 Open the grass image in Photoshop. |
 |
| Step 2 Select the Crop Tool (C) and crop the image to the grass area you want to make seamless. In this case I will be using an area of 1400 x 700 px. |
 |
| |
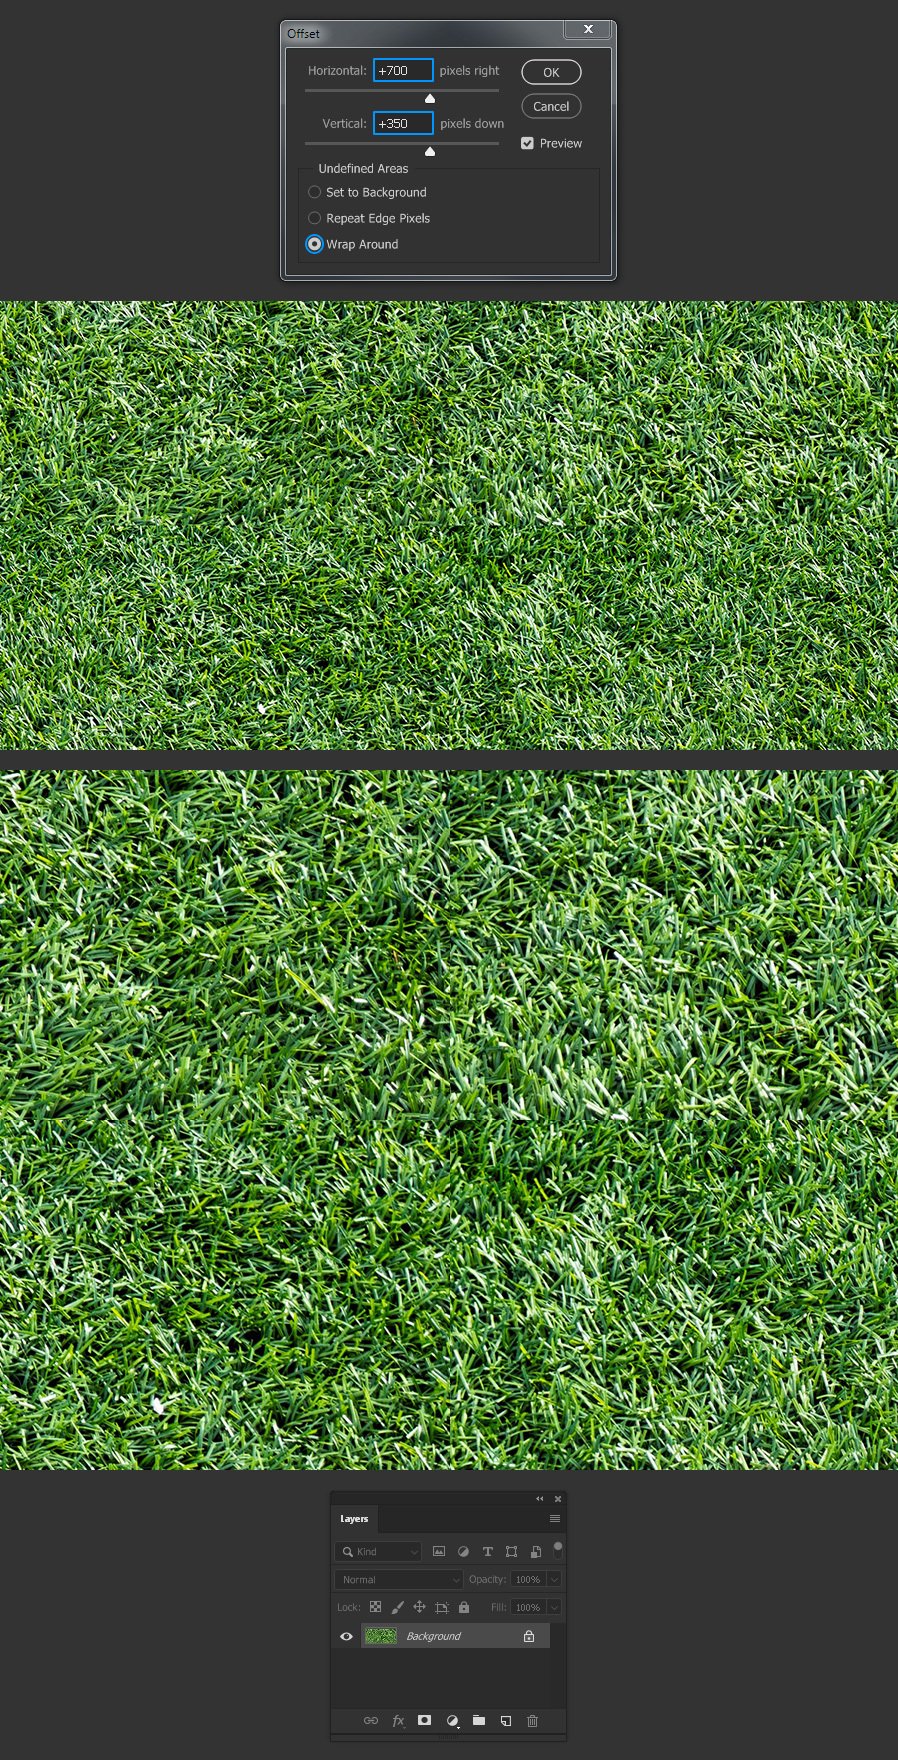
Step 3 Go to Filter > Other > Offset. As our image size is at 1400 x 700 px, we need to enter the exact same half on the Horizontal and Vertical fields. In this case, set the Horizontal value to 700, the Vertical one to 350, be sure to have the “Wrap Around” option selected and click OK. |
| |
 |
| |
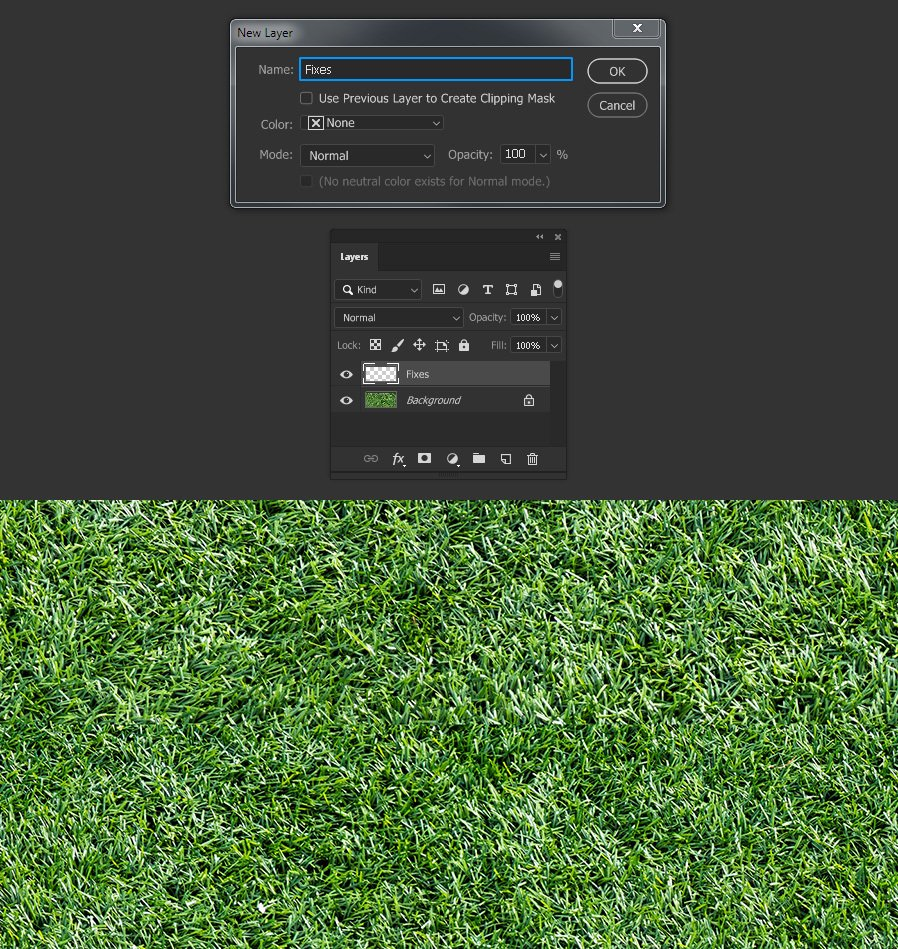
Step 4 As you may notice, the union between the 4 different parts created is too obvious, so we need to fix that. Go to Layer > New > Layer. Name this layer as “Fixes” and click OK. |
| |
 |
| |
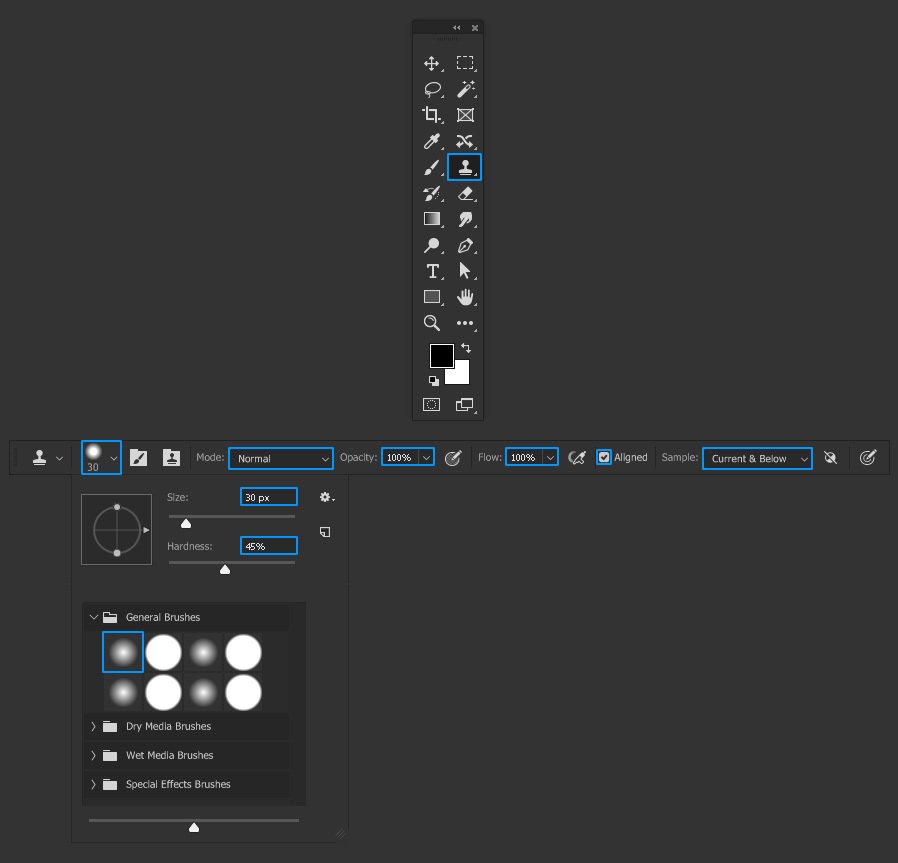
Step 5 Select the Clone Stamp Tool (S). In the top toolbar select the “Soft Round” brush with a size of 30 px, the Hardness set to 45% and apply the following settings for the remaining options: |
| |
 |
| |
Step 6 With the Clone Stamp Tool selected, hold the “Alt” key on your keyboard and click anywhere a bit far from the center of the grass texture to set that point as a starting point of our cloning source. |
| |
 |
| |
Step 7 Release the “Alt” key and with short strokes start painting over the middle part of the image where the mismatching texture appears. |
| |
 |
| |
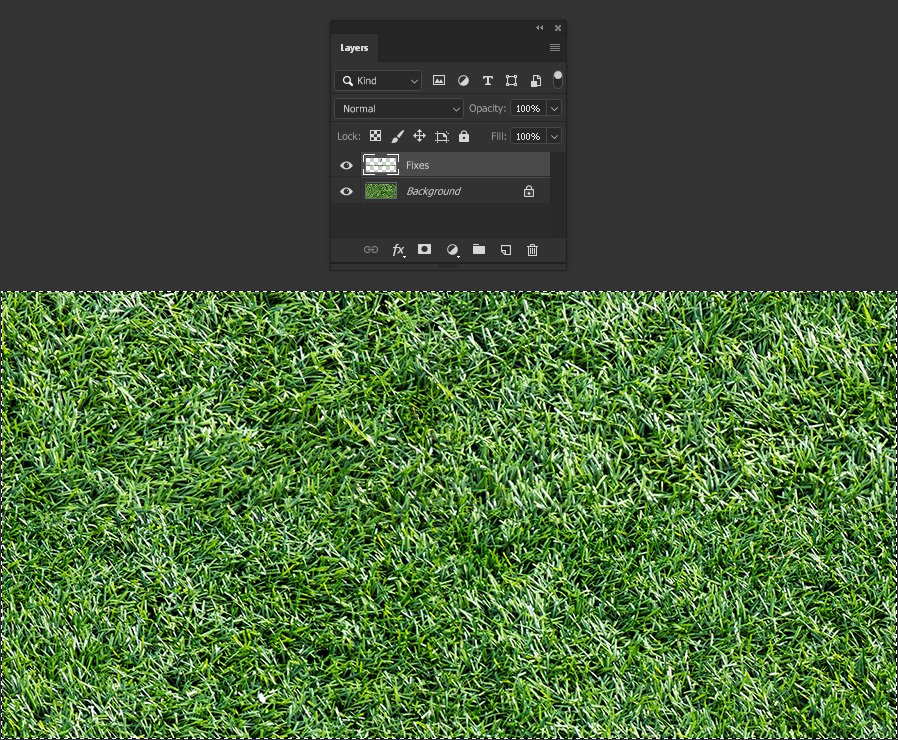
Step 8 Keep cloning the grass until you see no mismatching areas in the center of the image. A good practice is to use different clone sources along the whole image to make it more realistic. |
| |
 |
| |
Step 9 When you finish making the retouches, go to Select > All. |
| |
 |
| |
Step 10
All we have to do now is to save our pattern for a future use. With the whole canvas selected, go to Edit > Define Pattern. Name the pattern as “Grass 1” and click OK. |
| |
 |
| |
Step 11 To test the new pattern, make a new file bigger than the original source image. In this case, I will setup this new file at 3000 x 3000 px. |
| |
 |
| |
Step 12 Go to Layer > New > Layer from Background. Set the layer name to “Grass Texture Test” and click OK. |
| |
 |
| |
Step 13 Go to Layer > Layer Style > Pattern Overlay. Click on the arrow next to the pattern thumbnail, select the new Grass Pattern and click OK. |
| |
 |
| |
|
| |
Calendar |
| |
January |
| |
SUNDAY |
MONDAY |
TUESDAY |
WEDNESDAY |
THURSDAY |
FRIDAY |
SATURDAY |
|
|
|
1 |
2 |
3
TGIF Party! |
4 |
5
|
6 |
7 |
8 |
9 |
10
TGIF Party! |
11 |
12
|
13 |
14 |
15 |
16 |
17
TGIF Party! |
18 |
19
|
20 |
21 |
22 |
23 |
24
TGIF Party! |
25 |
26
|
27 |
28 |
29 |
30 |
31 |
|
|
| |
|
| |
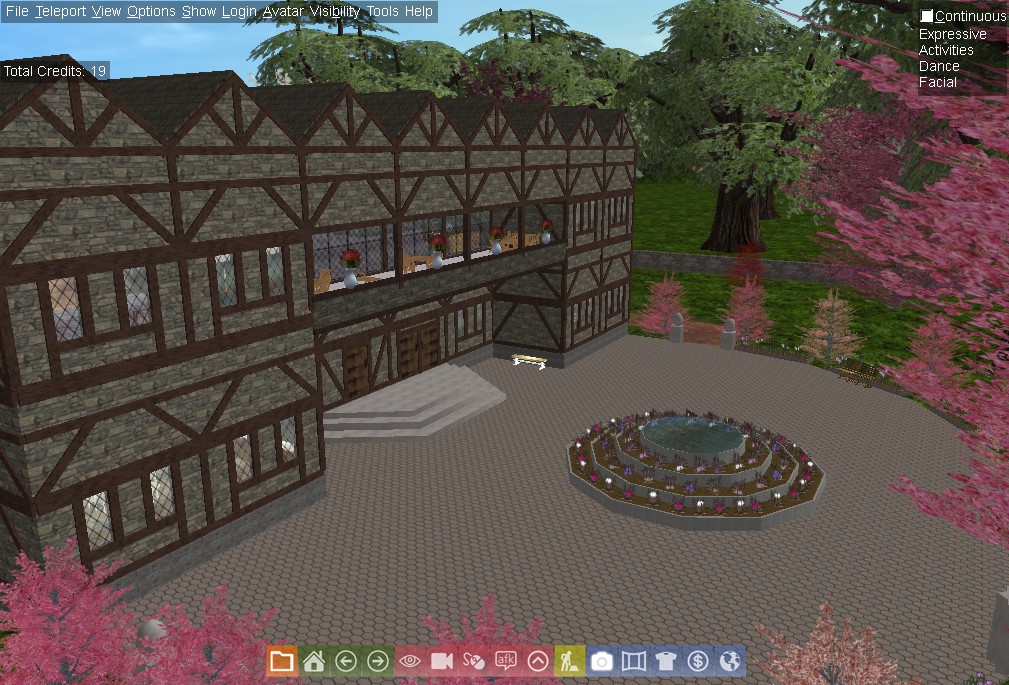
Around AW |
| |
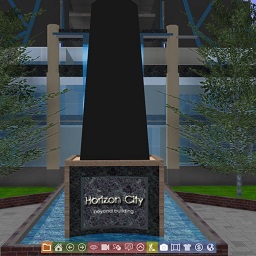
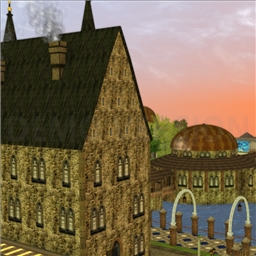
Horizon City |
| |
|
AlphaWorld 7012S 14001E
Horizon City is a large city in the southeast sector of Alphaworld. The city area covers about 10 km2, making the city to be the second largest town in Alphaworld by area. About 400 builders makes the city to be largest town in Alphaworld by population.
The City is surrounded by three big beltways and one embankment between the second and third beltway. The second beltway surrounds the whole city by making a big circle of which radius is exactly 482 coords from the city center. City area is usually defined to end between the second beltway and the embankment. Most of the area is covered with objects built by city staff to prevent vandalism and to allow future expansions.
Unique form of Horizon City Ground Zero area has remained during the city history even though the latest objects and V4-features are implemented there too |
| |
|
| |
Games, Comics, etc. |
| |
|
 |

|
  |
 |

|
| |
| |
Dewey's Maze
|
| |
|
 Solve my maze. Solve my maze. |
| |
|
| |
|
| |
Senior Editor |
Cablecar Gal |
Contributor |
Golder UK - Peacekeeper |
|
Lensman |
|
Stayjit |
|
Rod57 |
|
Virtual Fork |
|
Virtual Spoon |
|
Charlies |
Contributor |
Perra |
Contributor |
Chris |
|
365962 Panne |
Contributor |
NY Giants |
Contributor |
Pelican |
Contributor |
Wikipedia |
|
Staff Credits |

Solution |
 |
| |
| |
| |
| |
| |
| |
| |


.JPG)